A tight first shot with out of bounds left and a ditch up the right requires a well-placed drive down the right-hand side of the fairway, which opens up the green but beware of three greenside bunkers with trouble left, right, and to the back of the pin. A challenging opening hole.
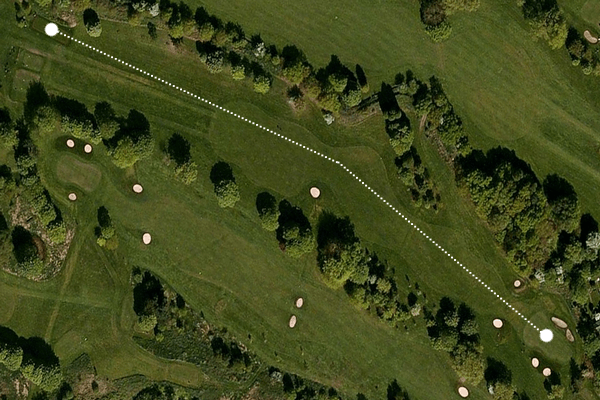
Hole 2: Par 4 - 378 Yds
The middle of the fairway is the ideal position for the second. Two tall trees on the right and a ditch on the left create an intimidating drive. This hole can be punishing if you are not accurate off the tee. On approach to the green, there is a bunker on the right-hand side of the fairway. A large green slightly sloping from back to front awaits you.
Hole 3: Par 3 - 179 Yds
A great par three is surrounded by three bunkers and tall trees around a sloping green. On approach to the tee, notice the size of the tree blocking the right-hand side of the green. A well-hit shot is required to get over this at any time of year.
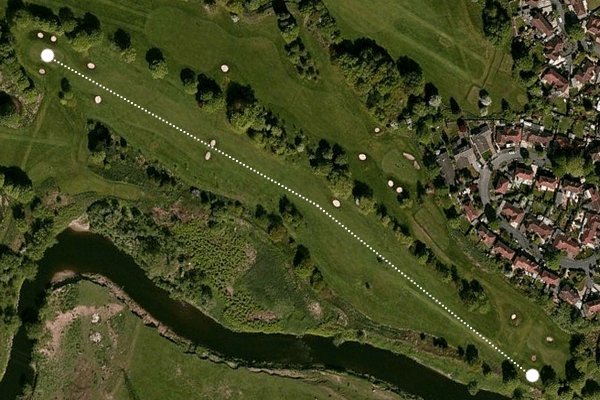
Hole 4: Par 4 - 380 Yds
The 4th is a slight dogleg from left to right. A narrow tree-lined fairway requires a good drive past the big copse on the left, opening up the fairway. Two bunkers protect the approach to this green. Place your second shot well as the flood bank hides these from view.
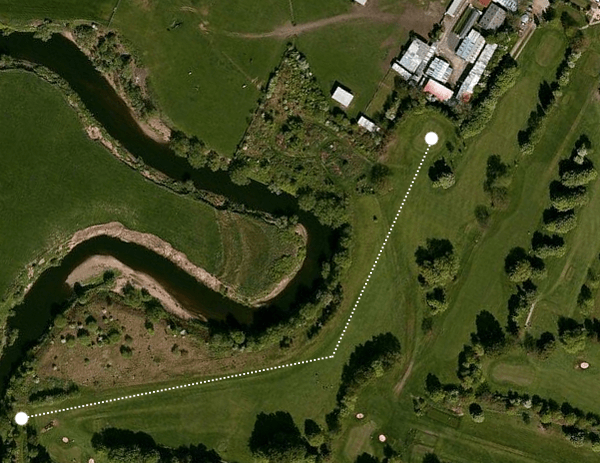
Hole 5: Par 4 - 376 Yds
A good drive to the left of the bunker will put you in the ideal place for the hole. But hitting the fairway is imperative as the copse of trees will prevent a clear second to the green. The green is surrounded by two approach bunkers and three greenside bunkers.
Hole 6: Par 3 - 156 Yds
A superb par three where the approach bunker foreshortens your view. The green is protected by three deep bunkers and slopes heavily from several directions—possibly the most challenging green on the course.
Hole 7: Par 5 - 493 Yds
A narrow par five with a bunker collecting a drive to far right and a thick tree line on the left. A well-placed drive down in the middle will leave you a second shot past the two fairway bunkers, leaving a short iron to the green. However, longer hitters beware as an under-hit approach shot will be gathered up by the two bunkers guarding a narrow entrance.
Hole 8: Par 4 - 374 Yds
This hole is a dogleg from right to left. A tree-lined left-hand side requires you to hit the middle/right-hand side of the fairway but beware of the massive weeping willow, which can block your view to the green if too far right. The sloping green from back to front is surrounded by one approach bunker and four greenside bunkers. A great hole!
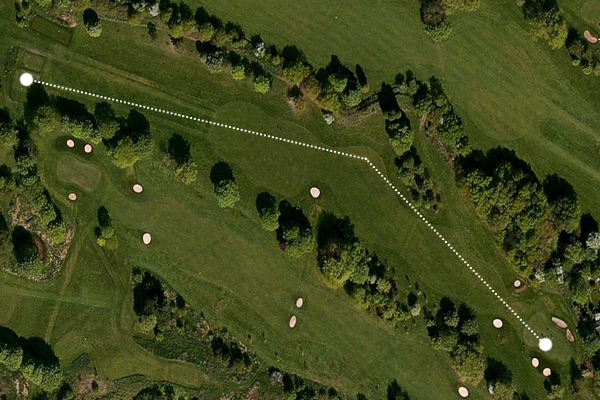
Hole 9: Par 4 - 445 Yds
This hole more than justifies its stroke one rating and can ruin a good card. An intimidating drive with out of bounds all down the left needs to be strategically placed past the corner to give any chance of hitting the green in two. A copse of trees short and right of the green will gather any under hit shot. A hard-won par feels like a birdie.
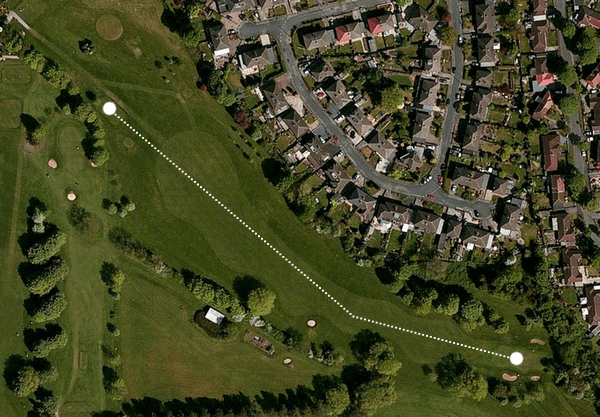
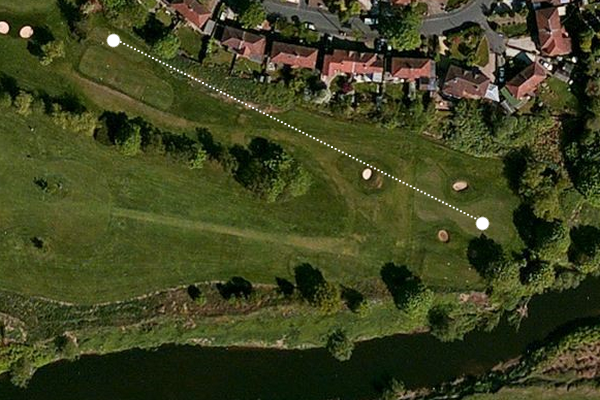
Hole 10: Par 4 - 323 Yds
Don’t be fooled by the length. A long iron or rescue club struck 200 yards to the tight bottleneck leaves a short iron to the raised green. The bigger hitters may feel like taking a driver, but accuracy is all-important.
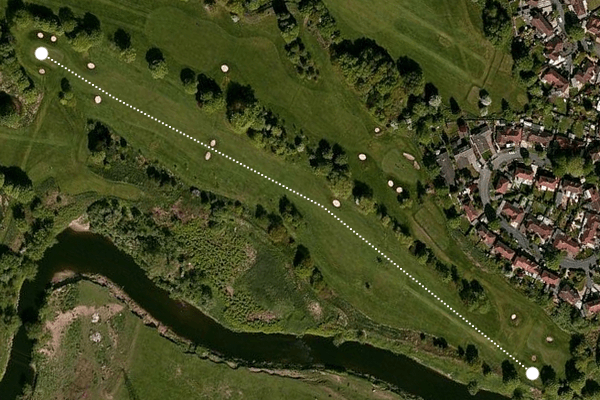
Hole 11: Par 4 - 402 Yds
A great par four usually played into a prevailing wind. The fairway narrows to more than 20 yards, protected at this pinch point by trees right and left. The long approach is further complicated by the ditch running down the left-hand side of the fairway and only three yards from the left-hand side from the green.
Hole 12: Par 3 - 179 Yds
A great par three is surrounded by three bunkers and tall trees around a sloping green. On approach to the tee, notice the size of the tree in the way of the right-hand side of the green. A well-hit shot is required to get over this at any time of year.
Hole 13: Par 4 - 380 Yds
The 13th is played as a dogleg from left to right. A narrow tree-lined fairway requires a good drive past the big copse on the left, which opens up the fairway. Two deep bunkers at the front of this green require accuracy with your second shot.
Hole 14: Par 4 - 377 Yds
This hole doglegs left to right. A good drive to the left of the bunker will leave you a straight shot into a well guarded green. However, the trees left, and right will severely hamper any chance of achieving par.
Hole 15: Par 3 - 156 Yds
A tough par three with the tee cut into the flood bank. Your shot is played with the out of bounds foremost in your eye line. This narrow and well protected undulating green is undoubtedly the toughest on the course.
Hole 16: Par 5 - 493 Yds
A long narrow par five protected with a thick tree line on the left and a well-placed bunker on the right, making an accurate drive essential. Your second shot is a mid-iron short of two fairway bunkers, creating a narrow entrance to the green, which leaves a short pitch at the pin. The long hitter can reach this green in two.
Hole 17: Par 4 - 420 Yds
A very strong par four normally played into the prevailing wind justifies its stroke two rating. A long accurate drive left of the fairway bunker leaves a long iron into a green well protected with a bunker short right and a further three greenside bunkers.
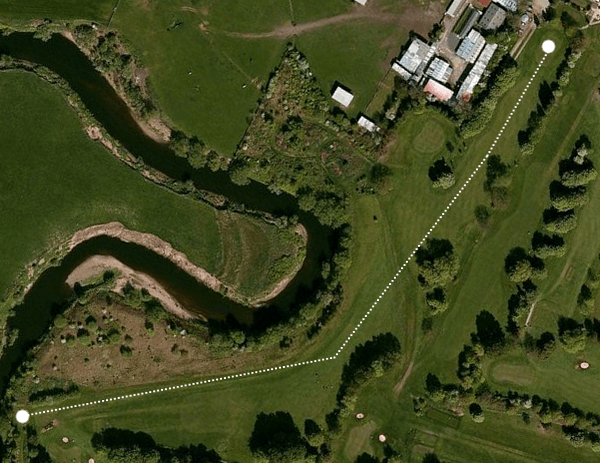
Hole 18: Par 5 - 550 Yds
This hole can make or break your score, with the accuracy demanded of your first two shots. Your drive needs to be placed at the corner of the dogleg. Beware of the out of bounds all down the left side, which allows you to play a long shot straight down the fairway between trees left and right, presenting a very narrow field of view, which sets up a short iron to a green that slopes back to front.
We use cookies to ensure that we give you the best experience on our website. If you continue to use this site we will assume that you are happy with it.OkNoPrivacy policy